Monday, November 29, 2010

Bodywork Progress #4 - 11/29/10

Car is safely back in the home garage.  Ended up having the fender repaired by the local Brit car shop.  $75 and it looks perfect. 
Note the trangular patch
that was welded in. 

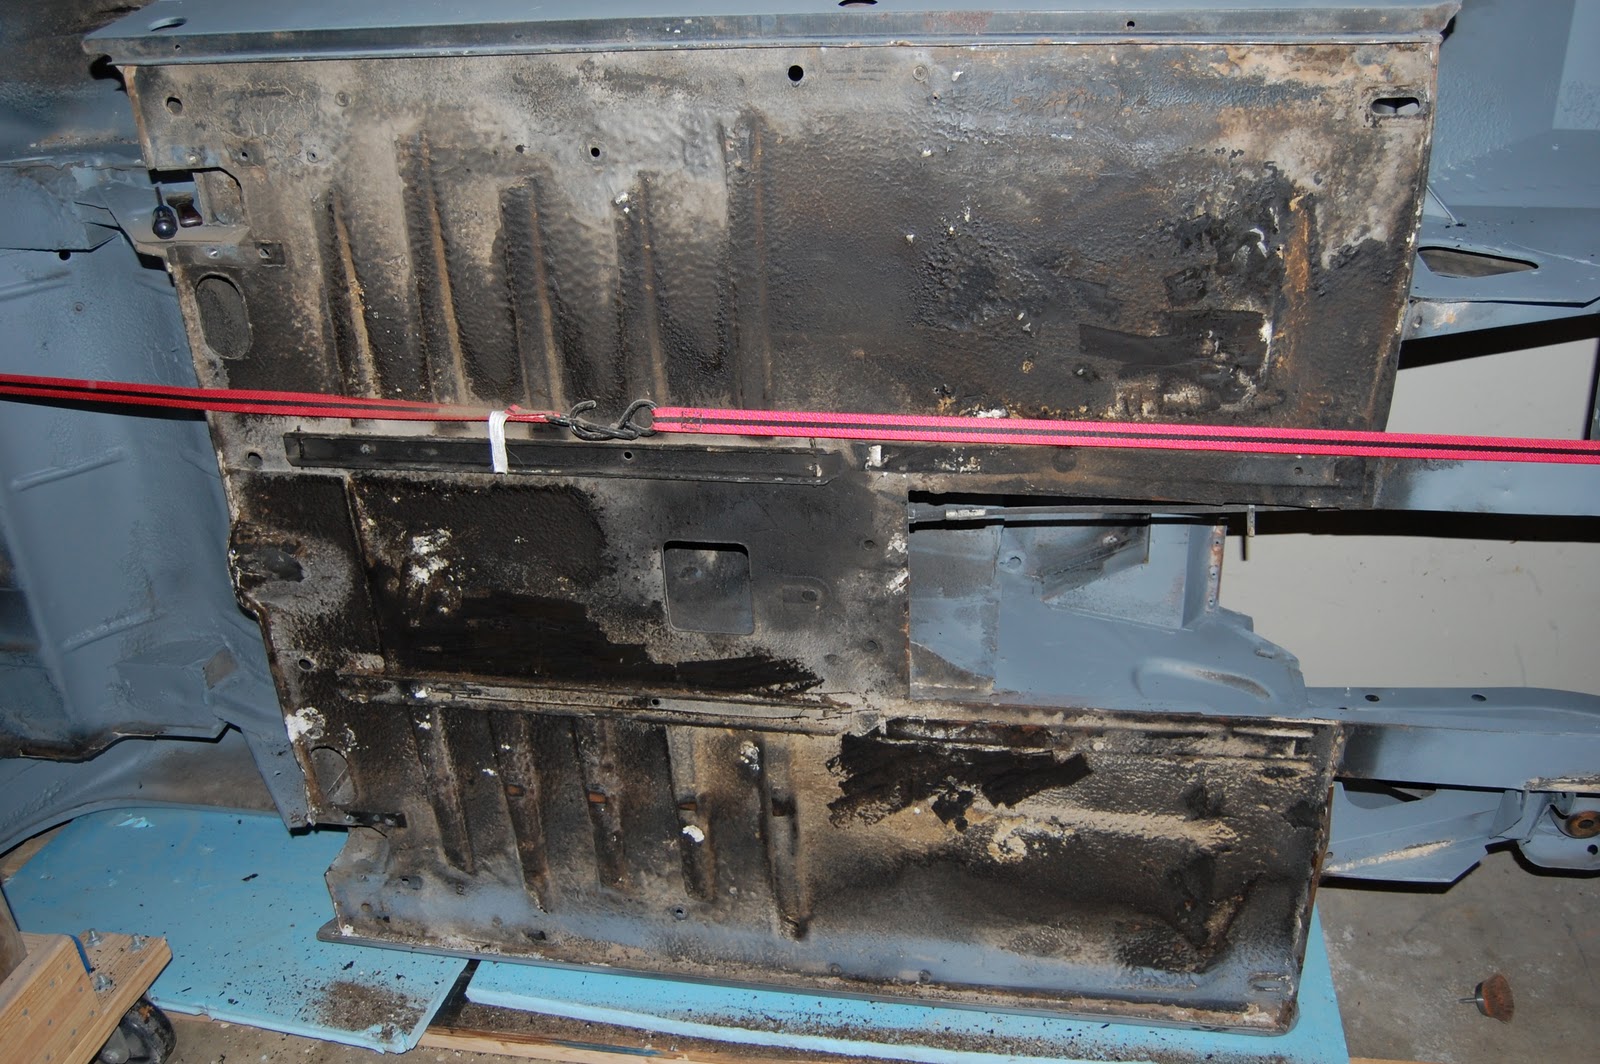
Here are some pics of the car, on its side in my garage, strapped in so that I can clean the underside.


Thursday, November 18, 2010

Bodywork Progress #3 - 11/18/10

Update -

The Midget is now safely ensconced in my garage for the holidays.  Vo-tech semester is almost over, so I brought it home to continue work.  Dropped damaged fender off at McLeod's British Cars, where he will repair the poor welding I did - $75. 

Once that's repaired, it's on to cleaning the underside of the car.  Prime and undercoat.

Tuesday, November 9, 2010

Engine Progress - 11/09/10

I'm going back and forth between engine and components (when I'm at home nights/weekends) and bodywork (nights at the vo-tech).   The past weekend, I did a little engine work.  I repainted the engine (remember the rust induced by the clothes dryer?) and collected the various studs, nuts, bolts & washers necessary to attach the 'peripherals'. 

I bought nuts/bolts from the local supplier.  Turns out he gave me 5/16-18 nuts for 5/16-24 threaded studs.   That will ruin the studs on your water pump housing.  I happened to be in KC last week, so I stopped in at Victoria British and got the appropriate studs, then went to Lowe's and got an abundance of 5/16 lockwashers and 5/16-24 nuts out of the 'Grade 5' specialty bins.

I could now attach the water pump housing, the water pump, the fan clutch/fan, and the fuel pump, dizzy, and alternator.

Took me a while to find out that the alternator bracket fit on the water pump housing.  As you can see, the
components are coming together.  Engine looks much nicer/cleaner with a coat of semi-gloss black engine paint.  I've not decided on the oil filter adaptor.  I probably won't use it.  But I had to understand how it went on.  I also think that my fuel pump is the one that doesn't require the spacer, but right now the spacer's on there.

I cleaned the fan up nicely with some household cleaner.  It was filthy when I got it.  And it's original!


See the alternator bracket?

Most recently, I decided to repaint the valve cover with silver.  I had painted it orange at first, but then realized that was inaccurate.  I used aircraft paint remover to take off the orange (using soaked steel wool to get in the crevices), then high heat Rustoleum primer (3-4 coats). wet sand with 600 grit, then topcoat with 5 light coats of high heat silver ("High Heat Silver, Away!" (sorry, couldn't resist...)).  I may clearcoat it as well.

11/11/10 Update - This morning I read an article that said you should never primer a valve cover or other engine component.   Hmmm...


Thursday, November 4, 2010

Bodywork Progress #2 - 11/04/10

Last night, made some good progress welding up some rusty pinholes.  MG sheetmetal is so thin, that I was constantly 'blowing out' the hole.  Instructor finally came over and corrected me.  Firstly, I was welding in the 'wind' from the a/c system, which is bad, because it promotes 'porosity'.  I also had the wire speed too fast and the voltage too high.  Once corrected, and moved to a less windy spot behind a screen, I was able to weld much more consistently.  So, I'm one night closer to getting to the 'bondo' work.

I've decided, after a failed attempt at repair, to just buy a new gas tank.

Tuesday, November 2, 2010

Bodywork Progress - 11/02/10


I'm making it to the vo-tech about 2-3 times a week now, and am making progress in small increments.  I've got until about Nov 20th to make as much progress as possible, and then 'class' is out for the holidays.  At that point, I'll probably bring the car home, so that I can clean/prep the underside somehow, in anticipation of paint.  I may even be able to do some 'bondo' work.

Last night, I addressed the crease in the passenger
door pillar.  You can clearly see the crease in
the photo to the right. The crease is the result of a 'learning opportunity'.  When somebody is helping you load your car on a trailer, and it's your money you just spent having it soda-blasted, make sure they tie the doors shut.  Especially if you load the car on the trailer facing backwards.

Initially, I wasn't sure how I was going to get the crease out.  But then I saw the Stud Welder Dent Pulling System in use, and figured I could do it.  The school has one, so I fired it up and tried it out.  It took 2 'passes' with the stud welder, but it's surprisingly easy to use. 

First, grind down to bare metal.  It's essentially welding, so you have to have a clean surface.  Once you've identified where you're going to place the studs, you plug in the welding gun, insert the stud in the tip, much like a pop rivet, and press firmly against the clean area of the car.  Pull the trigger, briefly, and the stud is affixed.  For the crease, I had to create a row of studs.  Then, working slowly and patiently (not my usual style), I tightened a slide hammer to each stud, and with a somewhat delicate, and progressively firmer hand, worked up and down sequentially, until i had
pulled the crease out. 

Then, I clipped off the copper studs, and using a die grinder, ground off the heads, until i had a (relatively) smooth surface.  Next, I welded new studs in the 'gaps' between the previous studs, and pulled some more.  The dent was really coming out, now.
Clipped studs


Clipped off the studs, ground off the heads.


Ground/Blow out


You can see just how thin this MG sheet metal is.  Some of the stud heads actually pulled out when I was using the slide hammer.  This left a hole that I had to MIG weld up.  My poor welding skills caused me to 'blow out' the sheet metal, making the hole bigger.  You can see this in the pictures.  I plan on correcting this week, with a more competent hand at the welder.

Wednesday, October 13, 2010

Current Midget to date

In order to 'cut to the chase', as they say, I'm going to summarize the last 5 years:

I brought the car back to Arkansas in 2005, whereupon I attempted to catalog the various loose parts.  Hmmm.  Shotgun shells... Unless the motor starts like the airplane Jimmy Stewart flew in 'Flight of the Phoenix', I won't be needing those...one 'complete' engine (for the most part) and one engine torn down...etc., etc.  I won't go into too much detail.

I eventually disassembled the entire car.  It wasn't enough to just get it running.  I had to do it all.  So, over the next few years, I bought a lot of parts...carpets, tires, trim rings, mirrors, rings, seals, gaskets, bearings. In 2006, I had the block 'boiled' and the head done.  The machine shop polished the cam and the crank, as well.  All for about $200. The only mistake I made was unwrapping the block before I was ready to re-build the engine.  Well, that's not quite true.  That was the second mistake.  The first mistake was venting my dryer into the garage.  The combination of moist dryer venting and an exposed block was, of course, RUST.  When my brother announced that he was coming up for the weekend, and would help me rebuild the engine, I panicked.  For another $90 of my 'MG money', I took the block back to the machine shop, and had him clean it up for me.  Ah, the lessons we learn...

With my brother's help, I reassembled the engine with new rings, gaskets, seals, bearings.  I painted the timing chain cover and the valve cover (which I'm now re-painting the correct silver).

Here are a couple of shots of the engine reassembly process...

Sunday, October 10, 2010

Current Midget Acquisition

It's been a busy weekend.  Last week, I replaced the shocks on the rear of my 2003 Honda Pilot.  I ordered a set of shocks/struts from justsuspension.com.  I got the KYB brand.   Replacing the shocks was easy, and it only took an hour, maybe.  My trusty air ratchet made it that much easier, especially when spinning off/on lug nuts.

This weekend, I tackled the front struts.  This task is not particularly daunting, but it is a hassle.  The struts/springs are heavy and unwieldy, they're dirty, you have to compress the coil spring, blah blah blah.  My sidekick, whom, in deference to his cyber-anonymity I will refer to as 'Sidekick', was there to lend a hand, and this was most fortunate.  After multiple trips to the auto parts store, to return the coil spring compressor I borrowed and to get a 'strut spring compressor', to the hardware store for sockets required that I didn't have, to Sidekick's house for Allen wrenches that I couldn't find, we successfully coupled the new struts with the old springs.  In the course of this process, I dropped the new bearing that came with the strut, and had to clean/grease each of the individual ball bearings, and re-assemble the bearing.  Fun.  It wasn't until today (hey, I had to stop to watch the Hawgs yesterday) that we got it reassembled.  One 'sproing' as we backed out (I assume this was a coil spring 'self-adjusting') and everything was good.  Hope this improves the ride of my 130k-mile daily chariot...

Here's a picture from the day in 2005 when I acquired the 1500 Midget.  My oldest brother  found the car in Cleveland, Tx.  I previously found him a 1959 MGA here in central AR, and he was returning the 'favor'.   See his blog here:  http://www.jimsmgarestoration.blogspot.com/. 
A fellow was divesting himself of his father's estate, and the Midget had been in the garage in the back for 20 years.  Seems his sister was driving it and the engine blew.  It was never re-built.  He was GIVING IT AWAY to whomever would come get it.  I borrowed a trailer and away I went (with wife in tow as well).

Five years hence, here's how I remember it:  the car was dusty, with 4 flat tires, a couple of engines, etc., but it was all there, pretty much.  I would find out later that there were some bits missing, but I've compensated for that over time.  The car was also straight.  It had never been in an accident, and, because it had been in storage for 20+ years, it didn't have much rust.  The floors were solid, the rockers were solid, the fenders were solid.

So, with the help of some muscle and a come-along, the car was dragged up on the trailer and tied down.  We started for home, some 7-8 hours away.  The trip was uneventful.